Hi All :-)
Hope you're all happily sewing up your long sleeves for winter!! We've been having such a mixed up winter in Sydney - one day we have beautiful sunshine, the next arctic winds!
I will admit up front, so we're all clear - this hack is fiddly... but the results are totally worth the extra work, I promise!
What you'll need:
Tea Party Dress patternTea Party Long Sleeve Add onBias - pre-made or make your own - I'll link you up with a fabulous
Youtube tutorial on how to cut continuos strips of bias from a rectangle. But first, here is the amount of bias you will need - you can make them in separate amounts rather than one large strip, the amounts below are the total amount needed. To break it down you'll need roughly 5.5" per placket and the balance can be halved for the ties.
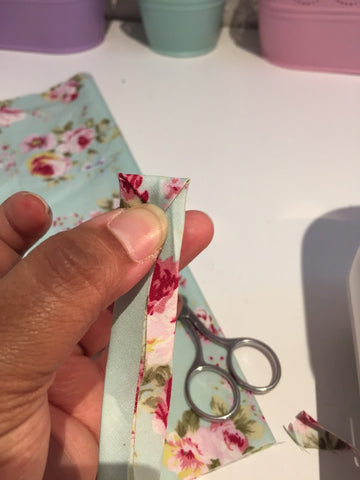
If you're making your own bias cut 1.5" wide strips.
If you're making long sleeves, remove the 3/4" hem allowance from the wrist of the sleeve. I used the 3/4 sleeve measurement from the straight sleeve to make 3/4 gathered sleeves - this hack will work for the 3/4, short gathered and long sleeve, you may have a bit of left over bias though.
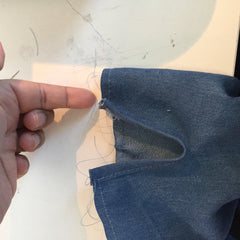
Fold your sleeve in half and make a 2.5" slit down the middle, repeat for other sleeve. This slit will be your placket.
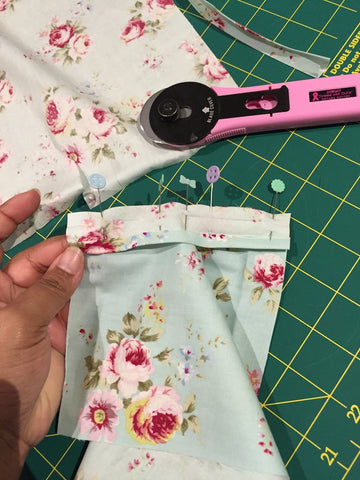
Pull the tip of each slit out to the sides so the placket sits flat, this is where you will be pinning your bias to create a bound placket.
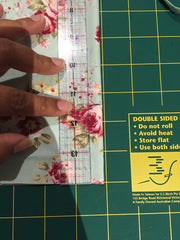
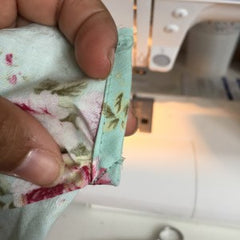
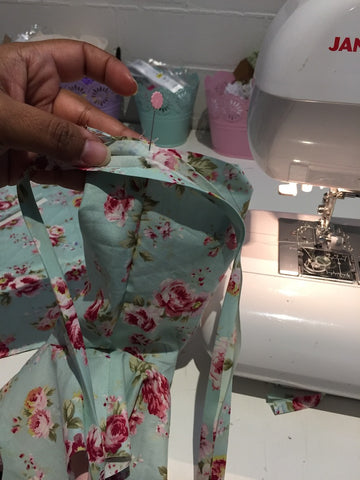
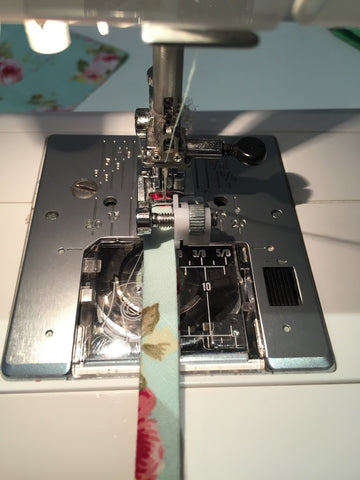
Unfold your bias and pin along your placket, right sides together, raw edges matching. Sew in the first fold.
Fold it over and tuck all the bias under and sew it down from the top, go slow to make sure you catch all the bias underneath. You can use Sewline glue to help hold it down.
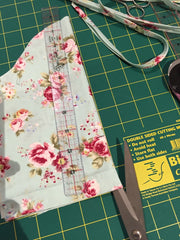
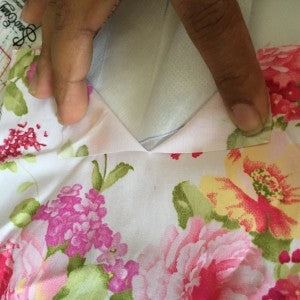
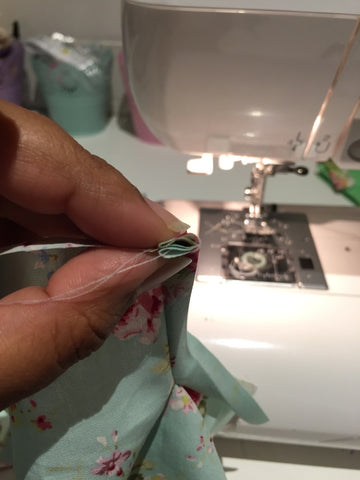
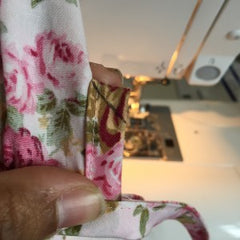
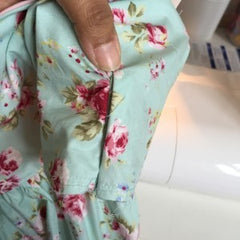
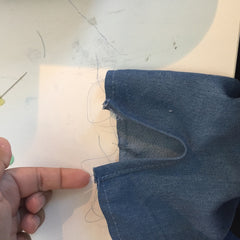
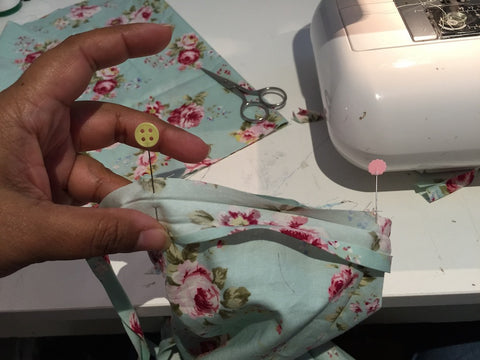
With your sleeve inside out, fold your new placket so that it is completely even, the raw edges of your sleeve should be lined up. You will sew a diagonal line from the top of the placket - see the picture where I've drawn a line (ignore the fact that my ties are already done, this bit was an afterthought). This step will allow your placket to sit flat afterward (like pic 3, below).
Treat your sleeve as per pattern now, except don't fold up the sleeve hem.
So, follow steps 1, not 2, 3-14 for the tricky method OR steps 1 - 2, not 3, 4-7 for the quick method.
Ignore step 15
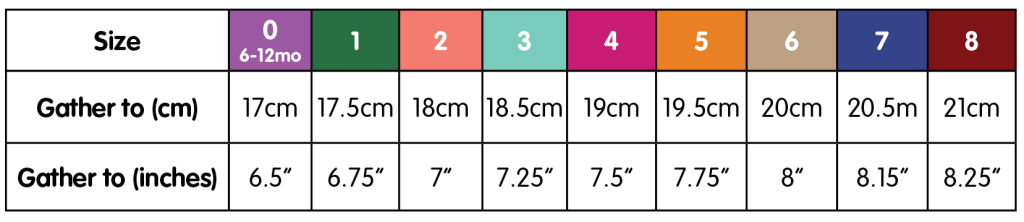
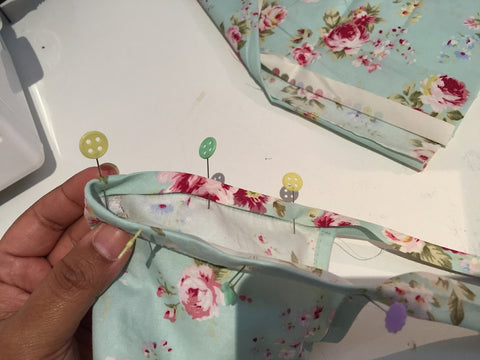
Instead, run a gather stitch from one end of the placket, around the raw edge the sleeve hem, to the other placket. Gather to roughly the lengths below, leaving a 3/8" gap at the ends the placket - so do not gather the actual placket portion.
Cut the remaining bias strip in half and find the centre of each strip.
Line up the centre of the bias strip, with the centre of the under arm seam and pin - we're attaching the exact same way as the placket.
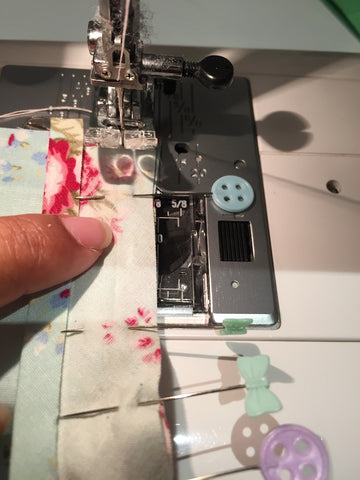
Start sewing in the first fold at the beginning of the placket, sew around to the other end of the placket - NOT the end of the bias strip, just around the sleeve hem at this stage.
Again, fold over the bias and pin the whole strip.
I like to miter my ends, but it's up to you how you enclose it.
Start from the end of the bias strip and sew approx 1/8" from the edge. Go slow and make sure you're catching all the bias on the other side - again, sewline glue is helpful to keep it all together.
Repeat for the other sleeve and then see section 3 on how to finish your skirt pieces.
Tadah!!!!
I had some fabulous ladies help me along the way with advice and testing the lengths of the ties. Rachel from
Bubbles & Butterflies and Martina from
Noble Cubs, thank you both so much. Also a huge thank you to Alana from
@itsbettyjaneadventures for the stunning pic of her gorgeous Betty in one of my dresses <3