Friday, 10 February 2017

How to Make - Hair Bows

I've been a little quiet lately, life is quite busy! However, the past week I've been hosting a Sew Along  for Tadah Patterns and the outfit I made during the SAL was for my friends cute little Miss.

Have you ever made a perfect outfit and then wanted some hair bows to match/contrast? Well, I made some and a few ladies started asking how I made them, so I figured it could be my first tutorial for the year!

So I have a template I use, I drew the measurements onto cardboard, that way when I want to make another I idon'thave to measure anything, I just use my template and cut!

What you'll need: a small piece of the fabric you wish to use, lightweight interfacing, contrasting fabric for the bow keeper, hot glue gun, needle and thread, clip or headband.

You need a rectangle 5 1/4" wide and 4" long


Then cut a bow keeper, 1" wide x 4" long


Cut a piece of lightweight interfacing about 3/8" smaller than the fabric


Iron on your interfacing


Fold up the long sides of the bow to the middle so they just overlap slightly and press well


Then fold the short ends in so they overlap slightly and press really well


Fold the bow in half, so the raw edges are on the inside


Then keep folding to form a bow


Hand sew the bow together


Fold your bow keeper in so the raw edges overlap


wrap the bow keeper around your bow middle


Cut off the excess bow keeper and sew the bow keeper raw edges together


Front view


Back view


Use your hot glue gun to attach to your choice of clip. If you were making it on a headband, insert your headband before you cut off the excess bow keeper and sew it all on together.

Happy sewing

Txx

Monday, 24 October 2016

Pattern Hack - Tadah Patterns Jaunty Dress, Slim Fit Tee or Dolman Combo

Hello everyone!! I've been super quiet lately - life has been a little hectic!! But I thought I'd give you all a little pattern hack for the newly released Jaunty Dress and Slim Fit Tee to personalise it a little. I've also used this method to splice the bodice on the Dolman Combo Tee
Adding panels to the bodice or skirt on your dress or tee is quite simple and very effective, all you need is your imagination and some tracing paper or tracing fabric. 
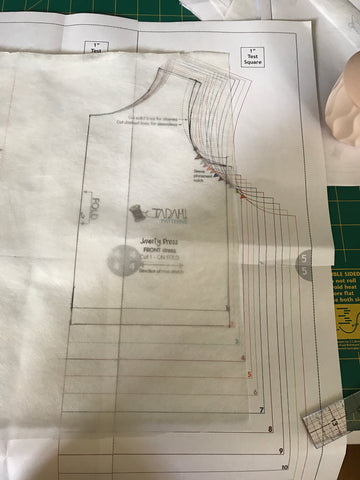
To start with trace your whole bodice in the size you need. To do this you'll need to trace on the fold (pic 1), flip the tracing, line up your fold line and trace the other side (pic 2) that way you have your whole bodice flat. 
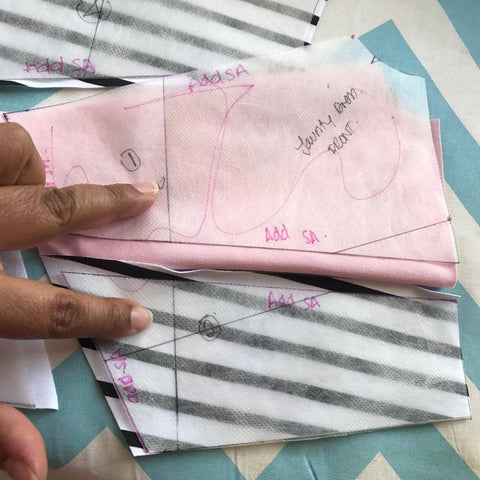
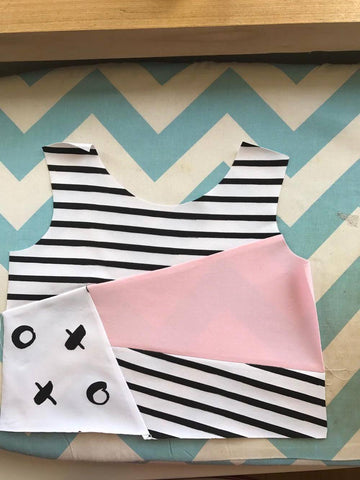
Then draw on the lines of the panelling you'd like to add to the bodice, see my example below. Here is a good time to think about how you'd sew the panels together - some pieces will need to go first, just like a puzzle. You can see below my bottom two angled pieces need to get sewn together first, then the bottom right, then those pieces will have a nice straight line to attach to the top.
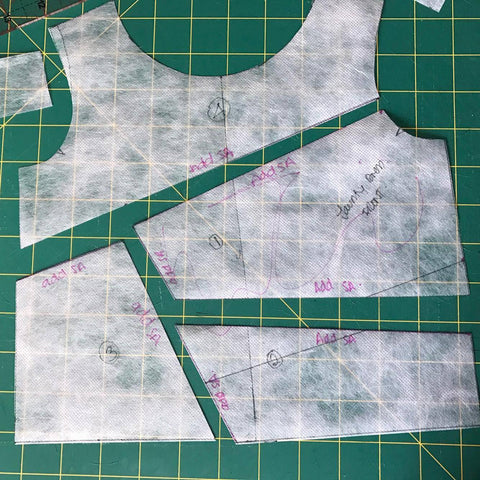
Next cut up your tracing along the 'panelled' lines. These will be your bodice pieces that you'll cut against. I highly recommend numbering your pieces in the order they get sewn together so you don't sew them together in the wrong order -  trust me on this partokay?
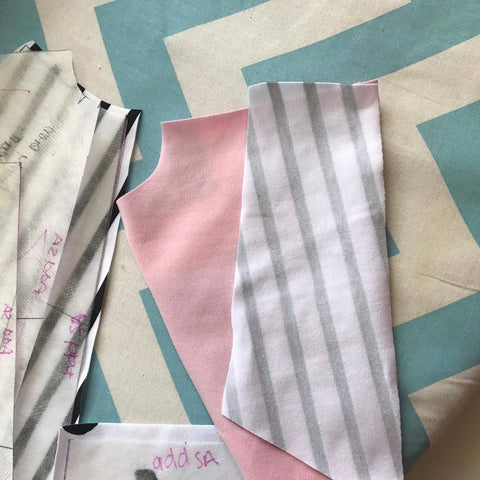
Also write on the tracing which lines you need to add your seam allowance to - you don't need to add to the outside of the bodice, just the lines you chopped up the bodice on, does that make sense? Hopefully the photo below will clear that up.
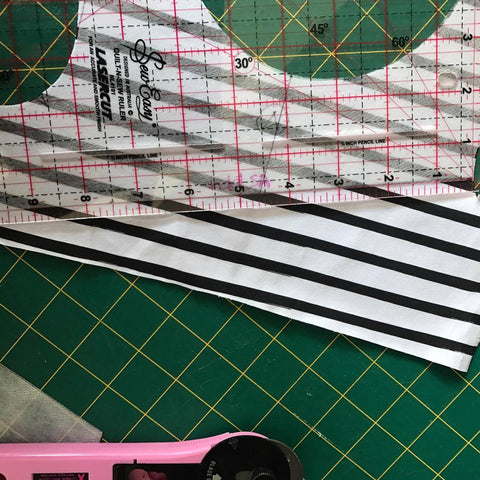
You can either a) re-trace these pieces and add your seam allowance to the new tracing or b) cut directly off these template pieces and add your seam allowance with a ruler while cutting (example in photo below) I find keeping the patterns seam allowance of 1/4" is the best and least confusing way to go.
So your panelled bodice should now roughly resemble a bodice.
Once you've cut your bodice pieces from the panelled template, you will then need to sew them together using the 1/4" seam allowance and press the seam allowance to one side.
Once you've sewn all the pieces together to form the bodice, clip off any little corners. IF you'd like to top stitch down your seam allowance, then do this now. 
And your panelled bodice is done!!
Finish your dress/tee as per the pattern 
Happy Sewing 
T x
 Pattern Used: Jaunty Dress with single circle skirt option
Pattern used: Dolman Combo