I
f you know me well, you know I don't do dresses! Well, till recently I didn't do them at all, then - DISNEY!! Ugh! They have totally managed to suck my kid in!! "Girls only wear dresses mummy" "no mummy, I want to be like a princess!!" *insert eye roll*
Anyhooo, I digress....
You all know I'm a huge Tadah fan and love testing for Lauren. It's always relaxed, fun and easy. So it was a no brainer that I'd be testing for
The Tea Party Dress.
Firstly let me say OMG OPTIONS!! 4 different bodices, 4 different back styles, two arm heights, 3 sleeve options and two types of skirt.... I'm rubbish at math, so I'll let you do the math.... That's lots of different possibilities huh??
The best part of the dress? You top stitch your lining down while the dress is still flat and the back seams aren't done yet!! So much neater. The worst part? The procrastination that comes with choosing from the gazillion options available! Ha!! Spoiled for choice really!
I made a few different neck lines but once I made the scoop back I was completely and totally in love!! #thatback *heart heart heart*
Dress: V neck, scoop back, high arm, straight skirt.
A funny story about this dress - I didn't like it at all after I'd made it. Then she put it on and *sigh*
When I posted some test fit pics in the test group someone mentioned it gave them beach/French vibes so I grabbed her felt hat and the camera and we ran down to the beach quickly to get the last of the light and I would have to say these are the best photos I've ever taken... Ever!
Then I thought "oh, it'd be so cute to have a tea party shoot with both my girls" and this is about the best I got.
L: boat neck, high arm, scoop back, straight skirt. R: scoop neck, scoop back, high arm, straight skirt

Soon after this shot, the little one realised that delicious looking macaroon was not real and she proceeded to rip down the background and throw a massive tantrum! (Ps: that amazing handmade fabric tea set you can sort of spy there was made by the one and only ChookShed Designs)
"Wahhhhh how dare you try to fake me out with a toy macaroon wahhhhhh I want a real macaroon"
I did manage a few other shots in between the tears!
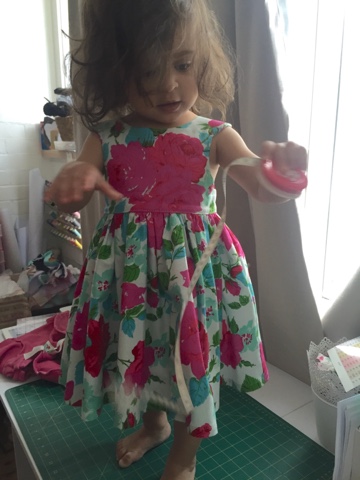
Then the weather took a turn for the worse and I've only managed some cruddy fit pics of the rest of the test dresses I made.
All up I've made 7 dresses with two more on their way as soon as I find the perfect coordinate.
This has the boat neck, scoop back, mini cap sleeve, straight skirt.
This is the boat neck, low arm, racer back, straight skirt. I could get through a pattern test without using some Cotton+Steel
Another boat neck, mini cap sleeve, scoop back, straight skirt. This is one of the most precious fabrics I own by the way - very out of print
Jennifer Paganelli Happyland
Please excuse my unpainted wall, we've just finished this extension and have run out of time and funds to paint it haha
But these are 6 of the dresses I've made
I'll leave you with that, I'm off to finish off the hem on #7
Head over to the
Tadah Patterns Facebook Group and check the pinned post for your discount code (next 48 hours)
Happy sewing
T xx


 Keeping the first 1/4" fold of the bottom hem folded up, turn the placket outward on the 3/4" pressed line you would have created in step 8 - so right sides are facing and the 1/2" fold of the placket is also folded up and tack this down at the second 1/4" pressed mark (along the fold you can see where my thumb is) repeat for other side.
 (a different view of what I've mentioned above)
 Clip the corners of the placket and flip right sides out - poke out the edges