For most of last year I used some polyester bags that I bought from Woolworths. They're perfect for me - they're tiny and roll up and I can keep a couple in my handbag so I never get caught out needing plastic! They're falling apart now after constant use for going on 11 months and of course Woolies stopped selling them.... just as they announced they were going plastic-bag-free... go figure!
So, I figured, how hard could it be to figure this out?? I found the most "loved" one and unpicked it and used the same measurements as I'd like it to fit at the check-out station when I do go to the grocery store, which, since discovering an amazing local farmers market, has been less and less.
I thought I'd do a quick tutorial for one because I'm super passionate about reducing the amount of plastic that ends up in our oceans and landfills.
What you need:
23" x WOF fabric of your choice. Something to keep in mind is the thicker the fabric the bigger it will be in your handbag... if you don't mind then, then use drill or even quilting cotton. A poly would be fine and much thinner to roll up.
5.5" elastic - whatever you have on hand will be fine - I used some sparkly FOE...
Cut:
2 x 20.5" wide x 17" long rectangles for the bag - if you want a smaller or larger bag, cut them smaller or bigger - it will literally work with most size rectangles!
2 x 6" wide x 13.5" long rectangles for the straps
3/8" Seam Allowance, unless otherwise specified
1 . Sew both short sides and one long side together. Right sides together to form the bag. Overlock or otherwise finish the edges. If you're using directional fabric, keep this in mind when you choose which 3 sides to sew down.
2. Overlock or press down the creases for a narrow hem around the whole top opening of the bag.
3. Narrow hem (or overlock and fold over) and sew down the long ends of the straps. Press. Overlock or otherwise finish the short ends of the straps
Overlocked, turned down and sewn
Narrow Hem, enclosed edges
5. Fold over the top of bag 1/4" and then 3/8" and sew down, take care when going over the elastic loop not to tangle it. If you don't want to enclose the overlocked seam, just fold over 3/8" and sew down. Press
Overlocked, turned in 3/8" and sewn down
Narrow hem, enclosed edges
6. Measure 1.25" from the side seam of all 4 edges of the top of the bag and mark.
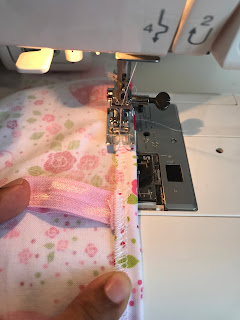
7. Working with one side at a time, pin and attach the straps at the 1.25" mark - right side of strap to inside of bag. I prefer to top stitch this bit down from the outside of the bag so I can make sure my stitching looks nice from the outside. Repeat for the other handle on the side you're working on. Then flip to the other side of the bag and repeat. I like to use a triple stitch (pictured below) to sew down the bags - it saves me going back and forth and making a mess on the outside of the bag. If you don't have this stitch on your machine, then just do a few rows of stitching to secure the handle well.
8. With the bag inside out, measure 4" in from each bottom corner
9. Fold the whole side of the bag in on the 4" mark toward the middle and sew down at seam allowance, repeat for other side. Turn right side out and poke out the bottom sides - it will be like an accordion or fan shaped fold - the bag will look narrow but have a wider capacity
10. Take the outer edge of one strap and fold under, wrong sides together till strap is folded in half.
11. Find centre top of strap and sew a line of sticking to hold down, repeat for other strap
12. Give it all a really good press
To Fold:
Fold in the long outer edges of the bag toward the middle, press well as you go so it holds the creases after you've used it - those creases will help you fold it back to a small roll when you're done using it!
fold bottom edge up
fold straps down
then roll upward
Take the elastic and loop it over to hold the roll together.
Voila!!!
I took it out today for a little shop to try it out and was stoked that it fit at the check outs for both Woolies and Big W
If you have any questions about the method, please ask me and I'd be only too happy to help!
Happy Sewing
T x


No comments:
Post a Comment